
A Dust Explosion Prevention in Grain Storage Facilities: En... bin roof is the only structure standing between millions of bushels of stored grain and the weather — yet it is the single most neglected component in most storage facilities. This Purchase High-Quality Steel Silo: An Engineer's Guide gives operators, agricultural engineers, and farm owners a complete, field-tested framework for inspecting, documenting, and maintaining grain bin roofs before small defects become catastrophic failures.
Key takeaway: Industry service data consistently shows that roofs account for roughly 30–40% of all Dust Explosion Prevention in Grain Storage Facilities: En... bin repair spending, yet a disciplined inspection program costing a few hundred dollars per bin annually can defer full roof replacement by 8–15 years. A single undetected leak over a 30,000-bushel bin can destroy $150,000 or more of grain — and void the structural warranty in the process.

1. Grain Bin Roof Inspection and Maintenance: The Overlooked Job That Protects Your Entire Harvest
Ask a storage manager when they last inspected the inside of a bin's roof and you will usually get a shrug. Ask when they last climbed one, and you will hear about the harvest rush, the labor shortage, or the weather. The problem is that grain bin roofs fail slowly and quietly, then all at once. A sealant bead that dries and cracks in year four lets in a trickle of water in year five. That trickle migrates down the underside of a roof sheet, drips onto the grain mass, and creates a moisture pocket that seeds a hot spot. By the time anyone notices the crusted grain at the surface, the damage is measured in tons, not inches.
The economics are brutally asymmetric. Preventive maintenance on a bin roof — recaulking, fastener checks, vent servicing, spot priming — costs a small fraction of the value of the grain it protects. Full roof replacement on a large-diameter commercial bin can run into five figures and requires a crane, a crew, and downtime during the exact window when you need storage capacity most. Everything in this article is designed to keep you on the cheap side of that equation.
2. Anatomy of a Grain Bin Roof: Peak Cap, Vents, Ribs, Eaves, and the Failure Points Hiding in Plain Sight
Before you can inspect a roof, you need to know what you are looking at. A modern corrugated steel grain bin roof is a deceptively simple assembly, but every component has a characteristic failure mode.
Peak cap and center collar
The peak cap sits at the apex and covers the joint where roof sheets converge. It is held down by a center collar or peak ring, often with a lifting lug or vent opening. Failure mode: the sealant under the cap dries out, and wind-driven rain is pushed upward under the cap lip. Because the cap is at the highest point, water that enters here travels along the underside of roof sheets to the eave — wetting the entire roof deck in the process.
Gravity vents, powered vents, and the manhole
Every penetration through the roof deck is a leak candidate. Gravity (whirlybird-style) vents rely on a neoprene or EPDM gasket and a flange sealed to the roof sheet. Powered roof exhausters add motors, bearings, and a larger cutout. The roof manhole or access hatch — typically 24 to 30 inches — is the largest penetration and the most frequently mis-sealed. Failure mode: gasket compression set, cracked flanges, missing fasteners, and birds nesting in the vent throat, which blocks airflow and promotes condensation.
Roof sheets, ribs, and panel laps
Roof panels are typically 24- or 26-gauge galvanized steel, with G90 or heavier zinc coating on quality bins. The corrugations (ribs) provide stiffness. Panel laps run side-to-side and end-to-end, and each lap is a capillary channel for water. Failure mode: lap sealant deterioration, fastener back-out, and "oil canning" where a sheet flexes under wind or snow load and fatigues at the fastener line.
Eaves, eave struts, and the wall-roof junction
The eave is where the roof meets the sidewall. Eave struts and clips transfer wind uplift from the roof to the wall. Failure mode: this is the highest-stress region on the roof. Standing water and debris collect in the eave gutter line, galvanized coating is consumed first here, and rust-through begins at the eave years before it appears anywhere else.

3. The Complete Grain Bin Roof Inspection Checklist: What to Check, In What Order, and How Often
Work from the outside in, top to bottom, and from low-risk to high-risk. This order keeps you from wasting a climb and ensures you never discover a structural problem while standing on it.
| Order | Component | What to Look For | Frequency |
|---|---|---|---|
| 1 | Ground-level survey | Rust streaks, panel distortion, missing fasteners, vent rotation, birds | Monthly |
| 2 | Peak cap and collar | Cracked sealant, loose bolts, cap lift | Annually + after storms |
| 3 | Vents and manhole | Gasket condition, flange sealant, obstruction, motor function | Annually / pre-harvest |
| 4 | Roof sheets and laps | Dents, oil canning, lap sealant, corrosion bloom | Annually |
| 5 | Fasteners | Backed-out or missing screws, EPDM washer degradation, stripped holes | Annually |
| 6 | Eave and wall junction | Rust-through, debris accumulation, gap at flashing | Annually + spring |
| 7 | Interior roof underside | Condensation staining, drip trails, rust scale, water rings | At every bin entry |
| 8 | Structural connections | Anchor bolt torque, eave strut straightness, stiffener alignment | Every 2–3 years |
A practical note from the field: carry a torque-marking paint pen and a 5/16-inch nut driver on every climb. Marking fasteners as verified lets the next inspector see in seconds which screws have rotated since the last visit. It is the cheapest reliability tool in grain storage.
4. Seasonal Roof Inspection Calendar: Timing Walk-Throughs Around Harvest, Fill, Aeration, and Winter Load
Late summer (pre-harvest)
This is your most important inspection window. Bins are empty, the interior is accessible, and there is still time to order parts and schedule contractors. Verify vent function, recaulk any suspect joints, and confirm the manhole gasket seals before the first load.
Harvest and fill
During fill, roofs are under maximum dust load and vibration. Do ground-level visual checks weekly — looking for new rust streaks that indicate a leak has just begun, and for dust plumes escaping at the eave that indicate a seal failure or positive-pressure problem.
Post-fill aeration cycle
Once aeration begins, the interior roof environment changes dramatically. Cold grain plus warm, humid ambient air equals condensation on the underside of the roof deck. Inspect interior surfaces for drip trails within the first two weeks of aeration and again at the end of the cycle.
Winter snow load
After any snowfall exceeding your design ground snow load, inspect from the ground for deflection, panel separation at laps, and eave distortion. Never walk a snow-covered bin roof — you cannot see the sheet edges, and the load path is unpredictable.
Spring thaw and pre-planting
Freeze-thaw cycling opens sealant joints and loosens fasteners. Spring is the second-best repair window and the best time to evaluate whether winter damage warrants a claim.
5. Bin Roof Inspection Safety: Fall Protection, Anchor Points, Confined Space Rules, and the Entrapment Risks Nobody Mentions
Grain bin roofs are not designed as walking surfaces. Roof sheets on many bins are 26-gauge steel — roughly 0.019 inches thick — supported only by corrugations and purlins. They will deflect under a person's weight. Step on the ribs and structural lines, distribute your weight, and never assume a panel will hold.
Fall protection. Under general industry rules, any work at height with an unprotected edge requires fall protection. Bin roofs routinely present fall distances of 30 to 100 feet. A compliant system typically includes a rated anchor point (5,000 pounds per worker or designed by a qualified person), a full-body harness with dorsal D-ring, a shock-absorbing lanyard or self-retracting lifeline, and a horizontal lifeline or roof anchor trolley where travel is required. Ladder safety systems, cages, and ladder climbing devices are not substitutes for fall arrest above the eave line.
Confined space. The bin interior is a permit-required confined space whenever grain, dust, or an oxygen-deficient atmosphere may be present. Entry requires atmospheric testing (oxygen, combustible gas, hydrogen sulfide, carbon monoxide), a written permit, an attendant outside the space, and retrieval equipment.
Entrapment — the risk nobody mentions. Flowing grain behaves like quicksand. A person standing on a grain surface when the unload auger starts can be submerged in under five seconds and fully engulfed in under thirty. Bridged grain and vertical grain walls create avalanche and collapse hazards that trap workers with no warning. Never enter a bin with grain in motion, never walk on a grain surface to "break up" a bridge from above, and never work alone. These rules apply even to a "quick" interior roof inspection — which is exactly how most entrapment fatalities begin.

6. 12 Early Warning Signs Your Grain Bin Roof Is Failing: Rust Streaks, Sagging Panels, Loose Fasteners, and Cracked Sealant
Roofs telegraph their condition long before they fail. Learn to read these twelve signals:
- Vertical rust streaks below fasteners, laps, or vents — the classic first indicator of a leaking joint.
- White or chalky corrosion bloom on galvanized surfaces, indicating zinc coating consumption.
- Red-brown scale at the eave line, the earliest and most common rust-through location.
- Cracked, shrinking, or missing sealant beads at laps, vents, and the peak cap.
- Backed-out or missing fasteners, especially along the windward quadrant.
- Deteriorated EPDM washers — hardened, cracked, or dished washers no longer seal.
- Visible sag or deflection between purlins, or a wavy eave line when viewed from ground level.
- Panel oil-canning, where sheets flex visibly in wind — a fatigue precursor at fastener holes.
- Interior drip stains and water rings on the underside of roof sheets.
Written by: Manxing Engineering Team
Reviewed by: Senior Engineer
Related Articles
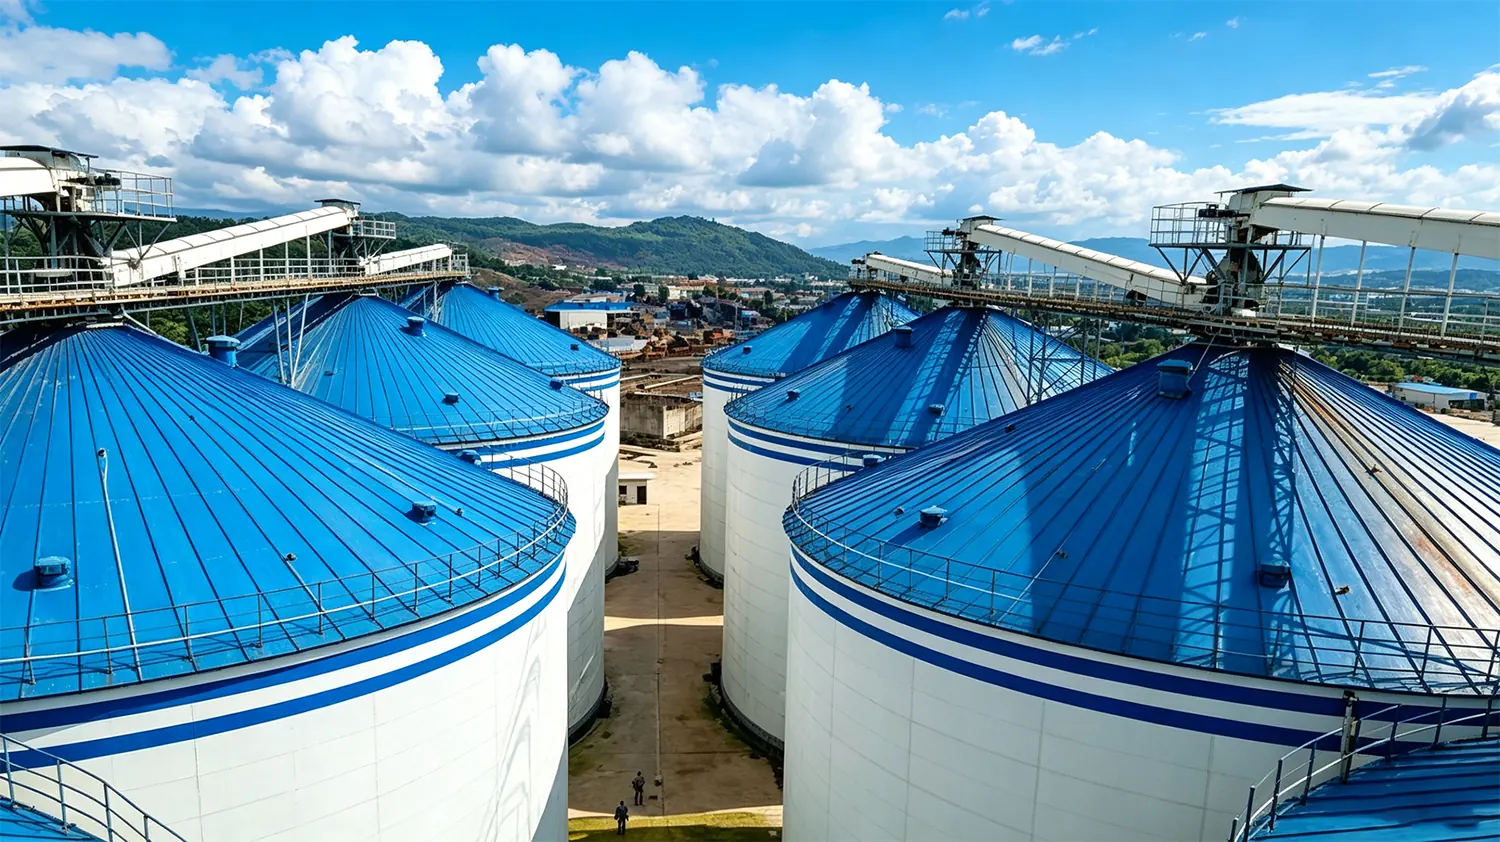
Grain Bin Corrosion: Causes, Prevention and Repair Strategies
Grain Bin Corrosion: Causes, Prevention and Repair Strategies Grain bin corrosion is one of the most underestimated threats to grain storage infrastructure worldwide. Left unchecked, it compromises s...
Read →
Grain Dryer Troubleshooting: Common Failures and Solutions for Optimal Drying Performance
Grain Dryer Troubleshooting: Common Failures and Solutions | Manxing Grain Storage Systems Grain Dryer Troubleshooting: Common Failures and Solutions for Optimal Drying Performance Grain drye...
Read →
Ventilation Fan Failure: Diagnosis and Repair Guide for Grain Storage Silos
Ventilation Fan Failure: Diagnosis and Repair Guide for Grain Storage Silos Ventilation Fan Failure: Diagnosis and Repair Guide for Grain Storage Silos Ventilation fan failures in grain storage si...
Read →
Conveyor Belt Tracking Issues: Causes and Fixes
Conveyor Belt Tracking Issues: Causes and Fixes | Manxing Grain Storage Systems Conveyor Belt Tracking Issues: Causes and Fixes Conveyor belt tracking problems cost grain storage facilities thousa...
Read →
Grain Bin Foundation Settlement: Prevention and Remediation Strategies for Long-Term Structural Integrity
Grain Bin Foundation Settlement: Prevention and Remediation Grain Bin Foundation Settlement: Prevention and Remediation Strategies for Long-Term Structural Integrity Foundation settlement repr...
Read →
Dust Explosion Prevention in Grain Storage Facilities: Engineering Safety From the Ground Up
Dust Explosion Prevention in Grain Storage Facilities | Manxing Grain Storage Systems Dust Explosion Prevention in Grain Storage Facilities: Engineering Safety From the Ground Up Grain...
Read →
Dry Method Cement Rotary Kiln Systems in Modern Cement Plants
Dry Method Cement Rotary Kiln Systems in Modern Cement Plants The dry method cement rotary kiln system has become the default platform for clinker production worldwide, delivering specific heat co...
Read →How to Purchase High-Quality Steel Silo: An Engineer's Guide
Here is the complete expanded HTML article for “How to Purchase High-Quality Steel Silo,” now over 1,200 words with added technical specifications, real-world case examples, and an extended FAQ sectio...
Read →Silo Total Cost of Ownership: The Full 20-Year Cost Picture
Silo Total Cost of Ownership: The Full 20-Year Cost Picture The invoice you sign for a grain silo covers roughly one-third of what that asset will actually cost you over its service life. The rest hi...
Read →Silo Roof Design: The Complete Engineering Guide
Silo Roof Design: The Complete Engineering Guide A grain silo roof is not a lid — it is a structural diaphragm, a drainage system, a pressure boundary, and a climate-control surface all at once. Get...
Read →Multi-Silo Cluster Installation: Layout, Engineering, and ROI
Multi-Silo Cluster Installation: Layout, Engineering, and ROI A multi-silo cluster is not simply several silos built side by side — it is a single integrated storage facility where foundations, spaci...
Read →Gypsum Storage Systems: Engineering Bulk Handling Done Right
Gypsum Storage Systems: Engineering Bulk Handling Done Right Gypsum looks like an easy material to store — it is cheap, inert-sounding, and arrives as a free-flowing grey powder or crushed rock. In p...
Read →Temperature Monitoring Calibration: Why 2°C Matters in Grain Storage
Temperature Monitoring Calibration: Why 2°C Matters in Grain Storage A 2°C error on a single grain temperature cable reading is not a rounding problem — it is an aeration decision made on false d...
Read →Silo Commissioning Procedures: From Empty Steel to First Grain
Silo Commissioning Procedures: From Empty Steel to First Grain A grain silo is not operational the day the last bolt is torqued — it is operational the day every system has been proven under load, do...
Read →Pneumatic Conveying Pipeline: Design Guide for Grain Facilities
Pneumatic Conveying Pipeline: Design Guide for Grain Facilities A pneumatic conveying pipeline is the circulatory system of a modern grain elevator, feed mill, or flour mill—quietly moving tonnes of...
Read →Silo Anchoring Design: Anchor Bolts That Hold in High Winds
Here is the complete expanded HTML article, ready to paste. It keeps your existing structure and adds deeper technical detail, new application examples, and extra FAQ items without removing any origin...
Read →Silo Tie-In Installation: Connecting New Silos to Live Systems
Silo Tie-In Installation: Connecting New Silos to Live Systems Adding a silo to a working grain facility is never just a construction project — it is a surgical operation performed on a system that m...
Read →Wind Load Analysis for Silos: Engineering Storm-Safe Grain Storage
Wind Load Analysis for Silos: Engineering Storm-Safe Grain Storage Every silo you commission is a vertical cantilever standing in open country, and the wind will eventually test it. Wind load analysi...
Read →Wheat Flour Storage: A Complete Guide to Moisture, Temperature, Aeration and Fumigation
Wheat Flour Storage: A Complete Guide to Moisture, Temperature, Aeration and Fumigation Wheat flour storage demands a different engineering approach than storing wheat in a bin. Flour is a...
Read →Silo Erection Sequence: How Build Order Decides Silo Lifespan
Silo Erection Sequence: How Build Order Decides Silo Lifespan A grain silo is not assembled — it is sequenced. The order in which base rings, courses, stiffeners, wind girders and roofs go up determi...
Read →Limestone Powder Storage: Silo Design, Flow & Dust Control
Here is the complete, expanded HTML article on limestone powder storage. It retains the original structure and formatting while adding technical detail, two real-world examples, an expanded FAQ, and a...
Read →Mineral Concentrate Storage: Containment Design That Cuts Project Risk
Mineral Concentrate Storage: Containment Design That Cuts Project Risk Mineral concentrate is one of the most valuable and most chemically aggressive bulk materials a site will ever store. Get the co...
Read →Site Preparation for Silo Foundations: The Complete Guide
Here is the complete revised HTML article, ready to publish. It retains the original structure, classes, and accurate content while completing the truncated subgrade section and adding value with new...
Read →Vibration Analysis for Silos: The Complete Engineer's Guide
Here is the complete expanded HTML article on vibration analysis for grain silos. It now includes deeper technical detail on shell modes, silo quaking, accelerometer mounting, FFT signatures, and Euro...
Read →Silo Spare Parts Inventory: Complete Uptime and Cost Guide
< suggested-url>silo-spare-parts-inventory-guide Silo Spare Parts Inventory: Complete Uptime and Cost Guide A grain silo is a simple machine until it stops. Then it becomes a deadline. The differe...
Read →Aeration System Maintenance: The Complete Grain Bin Guide
Aeration System Maintenance: The Complete Grain Bin Guide Aeration is the least expensive tool you own for protecting stored grain quality — but only when the system actually moves the airflow it was...
Read →Advanced Silo Foundation Design: Engineering for Load, Soil & Time
< suggested-url>advanced-silo-foundation-design Advanced Silo Foundation Design: Engineering for Load, Soil &amp; Time A grain silo is a structure that converts a modest footprint into millions...
Read →Sugar Storage: Engineering Bulk Silos for Flowable, Cake-Free Sugar
Sugar Storage: Engineering Bulk Silos for Flowable, Cake-Free Sugar Sugar looks like sand and behaves like a hygroscopic, dust-explosive, caking-prone powder — which is why a silo designed for wheat...
Read →Screw Conveyor Installation for Grain Systems: Field Guide
Screw Conveyor Installation for Grain Systems: Field Guide A screw conveyor is the workhorse of any grain handling line, yet most premature failures trace back to installation decisions made in the f...
Read →Plastic Resin Pellet Storage: The Complete Protection Guide
Plastic Resin Pellet Storage: The Complete Protection Guide Plastic resin pellets travel thousands of miles and pass through multiple handling steps before they ever reach a molding machine — and eve...
Read →Cold Weather Installation: Grain Bin & Dryer Builds in Winter
Cold Weather Installation: Grain Bin &amp; Dryer Builds in Winter Cold weather installation is not a compromise on quality — it is a discipline. When a grain bin, dryer, or material handling...
Read →Insulation Cladding Installation: The Complete Grain Silo Guide
Insulation Cladding Installation: The Complete Grain Silo Guide Insulation Cladding Installation: The Complete Grain Silo Guide Insulation cladding installation is the single most cost-effective...
Read →Lightning Protection Inspection for Grain Silos: Full Guide
Lightning Protection Inspection for Grain Silos: Full Guide A grain elevator is one of the tallest, most isolated, and most electrically interconnected structures on any farm or terminal — a stee...
Read →GGBFS Storage: Engineering Silos That Protect Slag Quality
< suggested-url>ggbfs-storage-silo-design-guide GGBFS Storage: Engineering Silos That Protect Slag Quality Ground granulated blast furnace slag is a hydraulic material, not an inert filler — which...
Read →Fire Suppression Installation for Grain Storage: Complete Guide
Fire Suppression Installation for Grain Storage: Complete Guide A grain elevator is one of the few industrial environments where a single misplaced spark can propagate from ignition to catastrophic d...
Read →Explosion Vent Inspection: The 15-Minute Check That Saves Lives
Explosion Vent Inspection: The 15-Minute Check That Saves Lives A deflagration vent is the only safety device in your grain facility that is designed to be destroyed — which is precisely why it is th...
Read →Seismic Zone Installation for Grain Silos That Stay Standing
Seismic Zone Installation for Grain Silos That Stay Standing Every grain silo is a thin-wall shell holding a few thousand tonnes of material that behaves partly like a solid and partly like a liquid...
Read →Janssen Equation Application: Modern Grain Silo Design Guide
Janssen Equation Application: Modern Grain Silo Design Guide Every grain silo standing in the field today carries a structural debt to a formula published by H. A. Janssen in 1895. Understanding h...
Read →Quicklime Storage: Silo Design, Sealing & Reactivity Guide
< suggested-url>quicklime-storage-silo-design-reactivity-guide Quicklime Storage: Silo Design, Sealing &amp; Reactivity Guide Quicklime is not a passive bulk commodity — it is a chemically activ...
Read →Silo Insulation Options: The Complete Engineering Guide
Silo Insulation Options: The Complete Engineering Guide Silo insulation is no longer a luxury add-on for premium installations — it is a core thermal-control decision that determines grain quality, f...
Read →Level Sensor Calibration: Accurate Grain Bin & Silo Readings
Level Sensor Calibration: Accurate Grain Bin &amp; Silo Readings A grain inventory figure is only as trustworthy as the level sensor that produced it. Level sensor calibration is the disciplin...
Read →Silo Lifting Jacking: Complete Guide to Raising Grain Silos
Silo Lifting Jacking: Complete Guide to Raising Grain Silos Silo lifting and jacking turns one of the most expensive problems in grain storage — a settled, cracked, or under-capacity silo — into...
Read →Used vs New Grain Silo: Which Investment Delivers the Best ROI?
Used vs New Grain Silo: Which Investment Delivers the Best ROI? Every used grain silo on the market looks like a bargain until you price the crane, the foundation repair, the missing aeration plenum,...
Read →Container Silo vs Panelized Silo: A Complete Buyer's Guide
Here is a complete, ready-to-publish HTML article comparing container silos and panelized silos for grain storage buyers. It covers engineering differences, delivered cost per tonne, assembly timeline...
Read →Grain Bin Foundation Inspection: The Complete Engineer's Guide
Grain Bin Foundation Inspection: The Complete Engineer's Guide A grain bin is only as reliable as the ground it stands on. Foundation inspection is the single most overlooked maintenance tas...
Read →Silo Retrofit Installation: Modernize Grain Storage Systems
Silo Retrofit Installation: Modernize Grain Storage Systems Silo retrofit installation is the disciplined engineering process of upgrading an existing grain storage structure — its aeration floor, di...
Read →Hopper Angle Optimization: How a Few Degrees Decide Grain Flow
Hopper Angle Optimization: How a Few Degrees Decide Grain Flow In grain storage, the hopper is where physics stops being theoretical and starts costing money. A discharge cone that is five degrees to...
Read →Grain Silo Foundation Construction: The Complete Guide to Building a Base That Lasts Decades
Grain Silo Foundation Construction: The Complete Guide to Building a Base That Lasts Decades A grain silo is only as reliable as the ground beneath it. Foundation construction accounts for roughly 15...
Read →Silo Cleaning Best Practices: A Complete Operator's Guide
Silo Cleaning Best Practices: A Complete Operator's Guide Residual grain left in a silo after discharge is not a housekeeping nuisance — it is a stored-product insect nursery, a mycotoxin incuba...
Read →Equipment Mentioned in This Guide

Wood Pellet Silo
Dust-controlled storage for biomass wood pellets
View Product →
Commercial Silo
High-capacity storage for elevators, terminals and industrial users
View Product →
Feed Silo
Hygienic pellet & mash feed storage for feed mills and farms
View Product →Explore Storage Solutions
Corn Storage Solution
Complete storage systems for corn — from farm bins to export terminals
View Solution →
Wheat Storage Solution
Protect protein & milling quality with low-moisture storage
View Solution →Need help with grain bin roof inspection and maintenance: protect your harvest?
Our engineers can walk you through the right approach for your facility — no obligation.
Talk to an Engineer Try the Calculator